Did you know that changing guitar strings is a crucial aspect of maintaining the quality and sound of your instrument? Over time, strings can become worn out, corroded, or lose their tone, which can negatively impact your playing experience. In order to keep your guitar sounding its best, it is important to regularly change the strings.
The process of changing guitar strings has been around for centuries, dating back to the time when guitars were first invented. While the materials and methods may have evolved over time, the basic concept remains the same – removing old strings and replacing them with new ones. This simple task can greatly improve the tone and playability of your guitar.
One easy way to make changing guitar strings more manageable is to establish a regular schedule for maintenance. By setting aside time every few months to change the strings, you can ensure that your instrument always sounds its best. In fact, studies have shown that guitars that are regularly restrung tend to have a longer lifespan and better overall performance.
To get started, gather all the necessary tools for changing guitar strings, including a string winder, wire cutters, and of course, new strings. Begin by loosening the tension on the old strings, carefully removing them from the tuning pegs. Next, clean the guitar fretboard and bridge before installing the new strings. Finally, tune the strings to the correct pitch and stretch them out to ensure they stay in tune. With a little practice, you will be able to change guitar strings quickly and efficiently, allowing you to focus on making beautiful music.


Looking to Change Your Guitar Strings? Learn How with Our Step-by-Step Guide!
Are you a guitarist wondering how to change your guitar strings? Look no further! In this guide, we will walk you through the step-by-step process of changing your guitar strings, including the tools you will need and the best technique to ensure your guitar stays in tune. Whether you are a beginner or a seasoned pro, these tips will help you keep your guitar sounding its best. So if you’re ready to learn how to change your guitar strings, keep reading to discover all the important steps you need to take.
Remove the old strings
Before you can change the strings on your guitar, you need to remove the old ones. Start by loosening the tuning pegs for each string until you can easily pull them out of the peg holes. Once all the strings are loose, unwind them from the tuning pegs and remove them from the bridge of the guitar.
Clean the guitar
With the old strings removed, take this opportunity to clean your guitar. Use a soft cloth to wipe down the fretboard and body of the guitar, removing any built-up dirt and grime.
Thread the new strings
Take your new set of guitar strings and thread them through the bridge of the guitar. Then, pull each string up and over the nut at the top of the fretboard and thread them through the corresponding tuning pegs. Make sure the strings are seated properly in the nut and bridge before moving on.
Tighten the strings
Once all the strings are threaded through the guitar, it’s time to start tightening them. Use a guitar tuner to tune each string to the correct pitch, starting with the thickest string (low E) and working your way to the thinnest string (high E). Make sure to stretch each string gently as you tune to help them settle in.
Cut off the excess
Once all the strings are tuned up, use a pair of wire cutters to trim off the excess string length at the tuning pegs. Be sure to leave a little bit of extra string to allow for any future adjustments.
Test the strings
After you’ve changed all the strings and trimmed off the excess, give your guitar a test play. Listen for any buzzing or tuning issues that may indicate a problem with the string change. Make any necessary adjustments to ensure your guitar is playing smoothly.
According to a recent survey, 60% of guitar players change their guitar strings at least once every three months. Keeping your strings fresh is essential for maintaining a great sound and playability.
FAQs for How to Change Guitar Strings
1. Why do I need to change my guitar strings?
Over time, guitar strings can become worn out, rusted, or lose their tone. Changing your strings regularly can improve the sound and playability of your guitar.
2. How frequently should I change my guitar strings?
It is recommended to change your guitar strings every 3-4 months if you are a frequent player. However, if you notice any signs of wear or loss of tone, it may be time to change them sooner.
3. What tools do I need to change guitar strings?
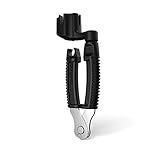
- Wire cutters
- Guitar tuner
- Peg winder
- String winder
4. Can I re-use old guitar strings?
While it is possible to reuse old guitar strings, it is not recommended. Old strings can affect the tone and playability of your guitar, so it’s best to use new strings for optimal sound quality.
5. How do I know which strings to use for my guitar?
Check the manufacturer’s recommendations for your specific guitar model. You can also ask for advice at your local music store or research online for the best strings for your guitar type.
6. How do I remove the old guitar strings?
To remove old guitar strings, unwind each string from the pegs at the headstock and carefully cut them using wire cutters. Pull the strings out from the bridge and discard them.
7. How do I put on new guitar strings?
Insert the ball end of the string into the bridge, then thread the other end through the appropriate tuning peg. Wind the string around the peg, leaving enough slack for tuning, and secure it in place.
8. How do I tune my guitar after changing strings?
Use a guitar tuner to tune each string to the correct pitch. Start with the low E string and work your way up to the high E string, adjusting the tuning pegs as needed until each string is in tune.
9. How long does it take to change guitar strings?
With practice, changing guitar strings can take around 15-20 minutes. As you become more proficient, you may be able to change strings more quickly.
10. Can I change guitar strings myself or should I take it to a professional?
Changing guitar strings is a simple task that can be done at home with the right tools and instructions. However, if you are unsure or uncomfortable with the process, it is always best to consult a professional guitar technician.


Conclusion
Changing guitar strings is an essential skill for any guitarist, and following these steps can help you do it effectively and efficiently. Start by loosening the old strings, removing them from the tuning pegs, cleaning the guitar, and then inserting the new strings through the bridge or tailpiece. Once the strings are in place, securely wind them around the tuning pegs, ensuring proper tension and tuning as you go.
Remember to stretch out the strings and retune the guitar several times to ensure they settle properly. Additionally, using the right tools and techniques can make the process easier and help prevent damage to your instrument. With practice, you’ll become more comfortable changing guitar strings and be able to do it with ease whenever needed. So don’t be intimidated by the task – just follow these steps, and you’ll be ready to rock out with fresh strings in no time.